Post by OxfordUltras on Jun 15, 2013 16:45:48 GMT
After a few threads on here recently about inproving the atmosphere at matches and people making their own flags, I thought I’d put together another guide. Some of you might remember back to the good old days of TiU and I put up a thread then about how to make one, but that’s long gone and somewhere in the depths of the WWW. So I decided to get round to finishing this and make it into a guide for you all. Obviously this is just one way to make them, but it’s always worked well for us, so hopefully a few of you will be able to use this method as well. Here we go…
How to paint your own flag, a step by step guide:
This is how I usually make my smaller sized flags, it can take a while to do it this way but if you are like me and have no artistic skills this will help you get your best design on to your flag with it still looking like your original design! It might not be the quickest way but with a little bit of patience you should hopefully end up with a nice quality flag for only a couple of quid. It’s well worth taking your time making it, as at the end of the day it will be on show at games (hopefully) so we don’t want it looking like a 6 year old has painted it then his pet rat has walked all over it leaving little foot prints here there and everywhere.
Things you will need are:
Fabric - We’ve always used the fabric called ‘polycotton’ as it’s cheap (couple of quid a meter) and durable.
Paint – Acrylic is my choice for smaller ones.
Paint Brushs – Get a few in different sizes, a pack of the small artist brushes should be fine.
Pencil/Pen
Tape
A Computer & Printer
Cling Film
Patience
Step 1:
Design your flag

Step 2:
Put it into black and white, to make it bolder to trace through and to save your printer from running out of colour.

Step 3:
Basically you want to spread your image across multiple pieces of paper so you can then print it of at the correct size you want to later trace through onto the fabric. There are plenty guides on the internet that tell you how to do this depending on what software you are running. Once you’ve got the size correct in relation to the fabric you have print away!
Step 4:
Start taping together your pieces of paper


Step 5:
Start tracing your image on to you fabric.

Step 6:
Mask of your floor, I use a roll of cling film and tape it down to stop the paint staining your floor, as it will go through the fabric. You can use other things instead of cling film, but I like to use it as it doesn’t stick to the back of your flag like cardboard does and everyone has a roll kicking about somewhere!
Step 7:
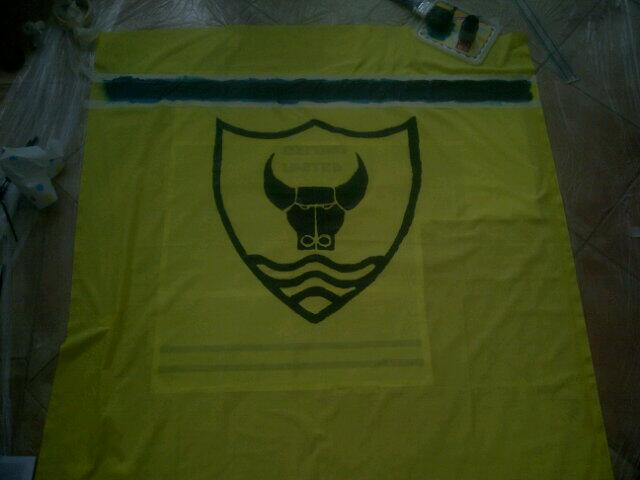
Start painting, doing one colour at a time, then allowing it to dry (shouldn’t take too long!) before applying the next colour. It’s important to take your time as you don’t want to spill paint anywhere (Might notice I dropped the brush making this one!) Bang on some Stone Roses tunes and that should keep you interested enough! Because if you are anything like me you will lose interest after about 5 minutes and never finish the damn thing.

Keep adding your different colours and building it up bits at a time.


Then add the final touches, a couple of little touch ups here and there and bingo you should be finished! You have your very own flag, including your own blood, sweat and tears.

How to paint your own flag, a step by step guide:
This is how I usually make my smaller sized flags, it can take a while to do it this way but if you are like me and have no artistic skills this will help you get your best design on to your flag with it still looking like your original design! It might not be the quickest way but with a little bit of patience you should hopefully end up with a nice quality flag for only a couple of quid. It’s well worth taking your time making it, as at the end of the day it will be on show at games (hopefully) so we don’t want it looking like a 6 year old has painted it then his pet rat has walked all over it leaving little foot prints here there and everywhere.
Things you will need are:
Fabric - We’ve always used the fabric called ‘polycotton’ as it’s cheap (couple of quid a meter) and durable.
Paint – Acrylic is my choice for smaller ones.
Paint Brushs – Get a few in different sizes, a pack of the small artist brushes should be fine.
Pencil/Pen
Tape
A Computer & Printer
Cling Film
Patience
Step 1:
Design your flag

Step 2:
Put it into black and white, to make it bolder to trace through and to save your printer from running out of colour.

Step 3:
Basically you want to spread your image across multiple pieces of paper so you can then print it of at the correct size you want to later trace through onto the fabric. There are plenty guides on the internet that tell you how to do this depending on what software you are running. Once you’ve got the size correct in relation to the fabric you have print away!
Step 4:
Start taping together your pieces of paper


Step 5:
Start tracing your image on to you fabric.

Step 6:
Mask of your floor, I use a roll of cling film and tape it down to stop the paint staining your floor, as it will go through the fabric. You can use other things instead of cling film, but I like to use it as it doesn’t stick to the back of your flag like cardboard does and everyone has a roll kicking about somewhere!
Step 7:
Start painting, doing one colour at a time, then allowing it to dry (shouldn’t take too long!) before applying the next colour. It’s important to take your time as you don’t want to spill paint anywhere (Might notice I dropped the brush making this one!) Bang on some Stone Roses tunes and that should keep you interested enough! Because if you are anything like me you will lose interest after about 5 minutes and never finish the damn thing.

Keep adding your different colours and building it up bits at a time.


Then add the final touches, a couple of little touch ups here and there and bingo you should be finished! You have your very own flag, including your own blood, sweat and tears.